

ChargePoint Home Flex Installation Guide
ChargePoint Home Flex Installation: 5 Essential Checks
ChargePoint Home Flex installation starts with understanding your home, your vehicle and the way you park. Choosing the charger matters, but a thoughtful installation is what makes plugging in convenient every day.
Before ordering, compare the connection options and gather the information your electrician will need. These five checks will help you move from browsing products to a clear installation plan.
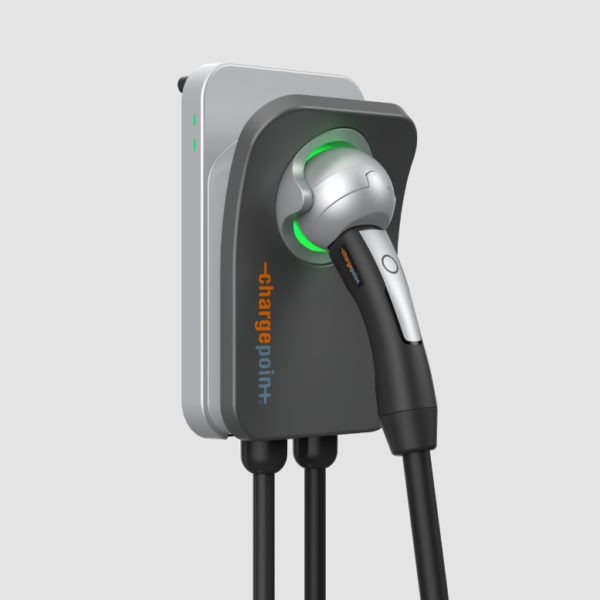
Understanding Your Home Flex Options
ChargePoint lists adjustable charging settings from 16A to 50A for Home Flex. The permitted setting depends on the installation. Its installation guidance distinguishes plug-in configurations from hardwired arrangements, with hardwiring required for 48A or 50A charging.
For plug-in installations, ChargePoint specifies supported NEMA 6-50 or NEMA 14-50 arrangements. Review the official Home Flex installation FAQ with your electrician rather than choosing a setting from the charger’s maximum rating alone.
1. Match the Charger to Your Vehicle
Begin with your vehicle’s charging connection and AC charging capability. A charger’s highest available output does not mean every vehicle can accept that output.
Record your vehicle’s model year and trim, then check its charging specifications. If another electric vehicle may join your household, include that possibility in the discussion. This helps your installer understand both your immediate needs and any realistic plans for the space.
Check the exact vehicle-side connector supplied with the product. Similar Home Flex listings may describe different configurations, so the complete order details deserve attention.
2. Decide Between Plug-In and Hardwired Installation
An existing outlet can make a plug-in option look straightforward, but its appearance is not enough to establish suitability. Have your electrician assess the circuit and installation against the manufacturer’s instructions.
A hardwired arrangement may suit a permanent charging location. A plug-in arrangement may also be appropriate where the required infrastructure is available. The choice depends on the site, intended charging setting and installation requirements.
Ask your installer to describe the proposed configuration in writing. This makes it easier to purchase the correct equipment and compare quotes covering the same work.
3. Plan Around Everyday Parking
Park your vehicle where it normally stays and check the position of its charging port. Consider whether you usually reverse into the space or drive in forwards.
Think about reaching the connector while carrying shopping, opening doors or moving around storage shelves. A mounting position that looks tidy on an empty wall can become awkward once the vehicle is parked.
Share photographs and measurements with your installer. Agree on the charger position and cable storage arrangement before work begins, especially if your garage has limited wall space.
4. Prepare for Setup and Everyday Use
Include commissioning in your installation discussion. Ask who will complete the setup and demonstrate the finished charger. This is also the right time to discuss any connected functions you expect to use.
Check connectivity requirements against the current product documentation. If a particular feature matters to your routine, establish that it can operate at the planned charging location.
Decide who in the household will manage charging settings. Keeping account details, operating instructions and support information together can make future questions easier to resolve.
5. Compare the Complete Installation Cost
A useful quote explains more than the cost of mounting a charger. Ask whether it includes the agreed electrical work, any required approvals, commissioning and cleanup.
Give each installer the same information. If one proposal assumes an existing circuit and another includes additional work, the totals are not directly comparable.
Before accepting a quote, confirm the equipment model and scope. Keep those details with your order confirmation so the delivered charger matches the installation plan.
Make Your Purchase Fit the Plan
A well-planned ChargePoint Home Flex installation should make charging a simple part of arriving home. Start with your vehicle, parking space and electrical assessment, then choose the exact product configuration.
Paying attention to these details before ordering can help avoid confusion about connectors, placement and installation costs. It also gives you a clearer idea of what to expect on installation day.
Explore ChargePoint Home Flex
Review our product listing and contact our team if you need help identifying the configuration requested by your installer.

Add comment